YouTube 썸네일
1280×720 YouTube 썸네일 레이아웃 다섯 가지를 소개합니다. 각 이미지 바로 아래에 실제 렌더링에 사용한 스크립트가 있으며, 저장소의 examples/ 폴더에서도 찾을 수 있습니다.
실행하려면 uv를 설치하고 저장소를 복제한 뒤 루트에서 스크립트를 실행하세요.
스크립트는 assets/에서 에셋을 불러와 examples/에 PNG를 기록하며 같은 이름의 기존 파일을 덮어씁니다.
git clone https://github.com/sjquant/quickthumb
cd quickthumb
uv run python examples/youtube_thumbnail_01.py
전후 비교 카드
사진을 배경으로 깔고 왼쪽에 제목, 오른쪽에 기울어진 카드 두 장을 배치했습니다. 전후 비교를 통해 어떤 변화를 얻을 수 있는지 바로 보여 줍니다.
- 가로
LinearGradient가 거의 검정인 색에서 투명으로 이어집니다. 왼쪽은 텍스트를 읽기 충분히 어둡게 유지하고 오른쪽은 사진을 보여 줍니다. - 세 줄 제목은 각자 크기와 색상이 있는
TextPart로 구성한.text()레이어 하나입니다. - 카드는
Stroke가 있는 회전한rectangle도형이며 앞쪽 카드에는Shadow도 있습니다. 카드의 텍스트도 같은rotation을 사용합니다.
examples/youtube_thumbnail_01.py
"""
YouTube thumbnail: before / after cards.

- Photo background, darkened on the left by a horizontal gradient
- Three-line headline built from TextParts with different sizes and colors
- Two rotated cards (rectangle + stroke, plus a shadow on the front one)
"""

import os

from quickthumb import Canvas, Filter, LinearGradient, Shadow, Stroke, TextPart

FILE_DIR = os.path.dirname(__file__)
ASSETS_DIR = os.path.join(FILE_DIR, "..", "assets")

os.environ["QUICKTHUMB_FONT_DIR"] = os.path.join(ASSETS_DIR, "fonts")
os.environ["QUICKTHUMB_DEFAULT_FONT"] = "Roboto"

# Create 16:9 YouTube thumbnail (1280x720) with method chaining
(
    Canvas.from_aspect_ratio("16:9", 1280)
    .background(
        image=os.path.join(ASSETS_DIR, "images", "c-g-JgDUVGAXsso-unsplash.jpg"),
        effects=[Filter(brightness=0.76, contrast=1.08, saturation=0.5)],
    )
    # Darken the left side so the headline reads over the photo
    .background(
        gradient=LinearGradient(
            angle=90,
            stops=[("#000000FA", 0.0), ("#000000D6", 0.48), ("#00000014", 1.0)],
        )
    )
    .shape(
        shape="rectangle",
        position=("8%", "13%"),
        width=12,
        height=12,
        color="#0A84FF",
    )
    .text(
        content="BEFORE  /  AFTER",
        size=18,
        color="#D2D2D7",
        weight=700,
        letter_spacing=3,
        position=("10.5%", "12.5%"),
    )
    # Add headline and subtitle as rich text with different sizes and colors
    .text(
        content=[
            TextPart(text="BETTER\n", color="#F5F5F7", size=96),
            TextPart(text="THUMBNAILS.\n", color="#F5F5F7", size=78),
            TextPart(text="FASTER.", color="#0A84FF", size=96),
        ],
        size=96,
        line_height=0.98,
        position=("7%", "54%"),
        align=("left", "middle"),
        bold=True,
    )
    .shape(
        shape="rectangle",
        position=(832, 370),
        width=260,
        height=300,
        color="#242426",
        border_radius=16,
        rotation=-7,
        align=("center", "middle"),
        effects=[Stroke(width=2, color="#FFFFFF55")],
    )
    .text(
        content="BEFORE\nTOO MUCH\nNO FOCUS",
        size=22,
        color="#A1A1A6",
        weight=700,
        line_height=1.7,
        letter_spacing=1,
        position=(750, 270),
        rotation=-7,
    )
    .shape(
        shape="rectangle",
        position=(1054, 366),
        width=300,
        height=340,
        color="#0A84FF",
        border_radius=18,
        rotation=5,
        align=("center", "middle"),
        effects=[
            Stroke(width=2, color="#FFFFFFAA"),
            Shadow(offset_x=0, offset_y=18, color="#00000088", blur_radius=24),
        ],
    )
    .text(
        content="AFTER\nONE IDEA.\nONE FOCUS.",
        size=28,
        color="#FFFFFF",
        weight=800,
        line_height=1.55,
        position=(958, 248),
        rotation=5,
    )
    # Render the thumbnail
    .render(os.path.join(FILE_DIR, "youtube_thumbnail_01.png"))
)

print(f"✓ YouTube thumbnail created: {os.path.join(FILE_DIR, 'youtube_thumbnail_01.png')}")
print("  Replace the background and text content with your own.")
강렬한 질문

대부분의 색상을 제거한 사진 위에 질문 하나를 아주 크게 배치합니다.
Filter(saturation=0.32)로 사진의 색을 낮춰 주황색 강조만 강하게 남깁니다.- 제목의 각 줄은 고정 픽셀 위치의 개별 텍스트 레이어이므로 줄 사이 간격을 정확히 제어할 수 있습니다.
- 문구 위의 가는 선은
#FFFFFF33, 즉 불투명도 20%인 흰색의 1px 사각형입니다.
examples/youtube_thumbnail_02.py
"""
YouTube thumbnail: one large question.

- Desaturated photo background with an angled gradient for contrast
- Each headline line is its own text layer at a fixed position
- A 1px translucent rule above the hook line
"""

import os

from quickthumb import Canvas, Filter, FitMode, LinearGradient

FILE_DIR = os.path.dirname(__file__)
ASSETS_DIR = os.path.join(FILE_DIR, "..", "assets")

os.environ["QUICKTHUMB_FONT_DIR"] = os.path.join(ASSETS_DIR, "fonts")
os.environ["QUICKTHUMB_DEFAULT_FONT"] = "Roboto"

# Canvas dimensions
WIDTH = 1280
HEIGHT = 720

(
    Canvas(WIDTH, HEIGHT)
    # 1. Background Image with darkening
    .background(
        image=os.path.join(ASSETS_DIR, "images", "denise-jans-WIRvXd1PYlg-unsplash.jpg"),
        fit=FitMode.COVER,
        effects=[Filter(brightness=0.78, contrast=1.12, saturation=0.32)],
    )
    # 2. Gradient Overlay (Dark bottom-left to transparent top-right)
    # This ensures text readability on the left side
    .background(
        gradient=LinearGradient(
            angle=110,
            stops=[("#000000F7", 0.0), ("#000000B8", 0.44), ("#00000012", 1.0)],
        ),
    )
    # 3. Typography
    # Subtitle: "ARE YOU"
    .text(
        content="ARE YOU",
        size=20,
        color="#FF9F0A",
        position=(54, 74),
        weight=700,
        letter_spacing=3,
    )
    # Headline Line 1: "BURNING"
    .text(
        content="BURNING",
        size=148,
        color="#F5F5F7",
        position=(46, 108),
        weight=800,
    )
    # Headline Line 2: "OUT?"
    .text(
        content="OUT?",
        size=148,
        color="#FF9F0A",
        position=(46, 250),
        weight=800,
    )
    # 4. Footer / Hook
    .shape(
        shape="rectangle",
        position=(52, 554),
        width=620,
        height=1,
        color="#FFFFFF33",
    )
    .text(
        content="5 SIGNS YOU'RE IGNORING",
        size=32,
        color="#F5F5F7",
        position=(52, 592),
        weight=600,
    )
    # Render
    .render(os.path.join(FILE_DIR, "youtube_thumbnail_02.png"))
)

print(f"✓ Thumbnail created: {os.path.join(FILE_DIR, 'youtube_thumbnail_02.png')}")
발표자 인물 사진

왼쪽에는 제목, 오른쪽에는 발표자를 배치합니다.
- URL에서 인물 사진을 가져와
remove_background=True로 배경을 제거합니다. Python 3.11 이상의rembg추가 기능과 네트워크 연결이 필요합니다.uv run --extra rembg python examples/youtube_talking_head.py로 실행하세요. position=(1280, 720)과align=("right", "bottom")은 사진 크기와 무관하게 인물을 오른쪽 아래에 고정합니다.max_width="55%"는 제목이 인물에 닿기 전에 줄바꿈합니다.
examples/youtube_talking_head.py
"""
YouTube Talking-Head Thumbnail

Classic split layout with subject on the right and headline on the left:
- Black background with a blue panel on the right
- Portrait from a URL, cut out with remove_background=True (needs quickthumb[rembg])
  and pinned to the bottom-right corner
- Two-tone headline built from TextParts, wrapped with max_width
"""

import os

from quickthumb import Canvas, FitMode, LinearGradient, Shadow, Stroke, TextPart

FILE_DIR = os.path.dirname(__file__)
ASSETS_DIR = os.path.join(FILE_DIR, "..", "assets")
OUTPUT_PATH = os.path.join(FILE_DIR, "youtube_talking_head.png")

os.environ["QUICKTHUMB_FONT_DIR"] = os.path.join(ASSETS_DIR, "fonts")
os.environ["QUICKTHUMB_DEFAULT_FONT"] = "Roboto"

# Replace with your subject photo (local path or URL)
PORTRAIT_URL = (
    "https://images.unsplash.com/photo-1560250097-0b93528c311a?auto=format&fit=crop&w=900&q=80"
)

(
    Canvas(1280, 720)
    .background(color="#000000")
    .background(
        gradient=LinearGradient(
            angle=90,
            stops=[("#000000", 0.0), ("#000000E8", 0.48), ("#00000011", 1.0)],
        )
    )
    .shape(
        shape="rectangle",
        position=(840, 0),
        width=440,
        height=720,
        color="#0A84FF",
    )
    .shape(
        shape="rectangle",
        position=(52, 132),
        width=56,
        height=5,
        color="#0A84FF",
        border_radius=3,
    )
    .text(
        content="30-DAY REVIEW",
        size=18,
        color="#A1A1A6",
        weight=900,
        letter_spacing=1,
        position=(52, 64),
    )
    # Main headline: stacked rich text with accent highlight
    .text(
        content=[
            TextPart(text="AI TOOLS.\n", color="#FFFFFF", weight=800),
            TextPart(text="WHAT ACTUALLY\nWORKS.", color="#0A84FF", weight=900),
        ],
        size=92,
        line_height=0.92,
        position=(48, 142),
        max_width="55%",
        effects=[
            Stroke(width=1, color="#000000"),
            Shadow(offset_x=0, offset_y=8, color="#00000099", blur_radius=14),
        ],
    )
    # Sub-copy anchored near the bottom
    .text(
        content="24 TESTED.  3 KEPT.",
        size=32,
        color="#D4D4D4",
        weight=500,
        position=(52, 620),
        effects=[Shadow(offset_x=2, offset_y=2, color="#000000", blur_radius=6)],
    )
    # Subject portrait — bottom-anchored on the right side
    .image(
        path=PORTRAIT_URL,
        position=(1280, 720),
        width=570,
        height=710,
        fit=FitMode.COVER,
        align=("right", "bottom"),
        remove_background=True,
        effects=[Shadow(offset_x=-14, offset_y=0, color="#00000088", blur_radius=22)],
    )
    .render(OUTPUT_PATH)
)

print(f"✓ Talking-head thumbnail created: {OUTPUT_PATH}")
print("  Replace PORTRAIT_URL with your subject photo for a personalised layout.")
반응
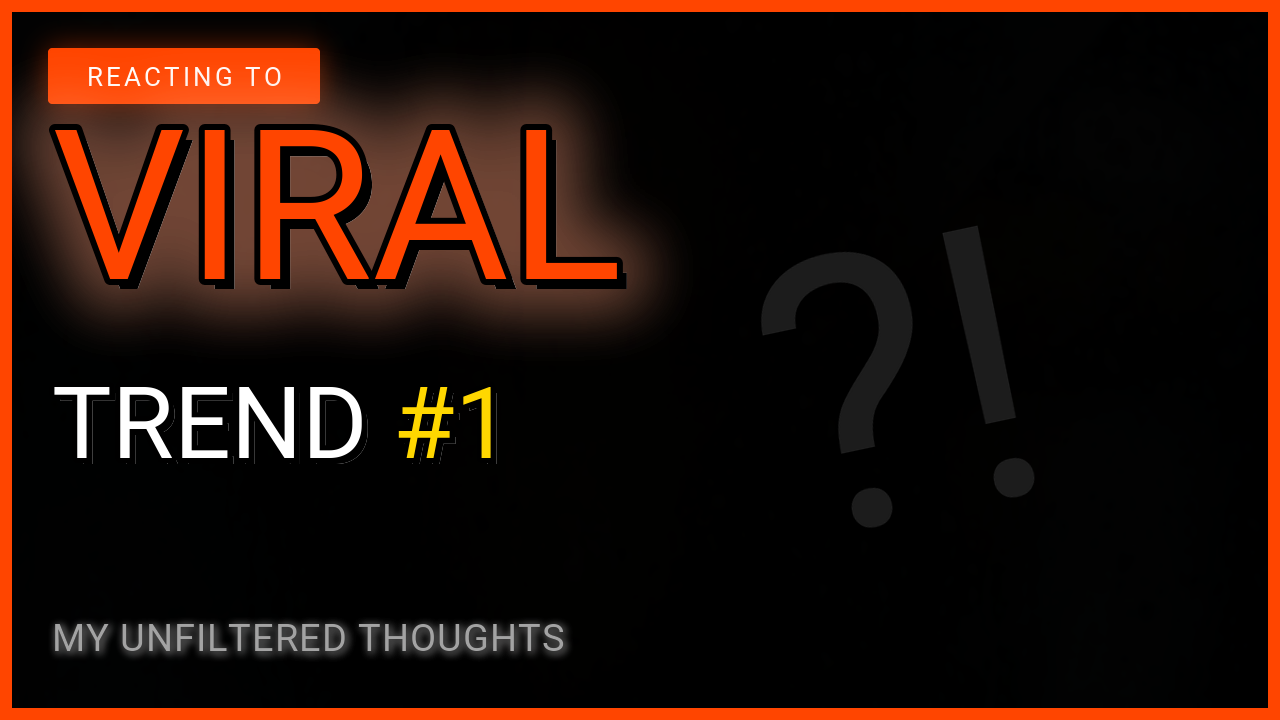
큰 단어, 큰 숫자, 반응하는 얼굴로 구성합니다.
- 인물 뒤에 중심을 둔
RadialGradient가 은은한 빨간 발광을 더합니다. 위에 놓은LinearGradient는 텍스트 쪽을 어둡게 유지합니다. - 전체 뒤의
#1은 불투명도 13%의 470px 텍스트 레이어입니다. - 인물은
rembg추가 기능이 필요한remove_background=True와Filter(saturation=0.08)을 사용해 거의 흑백으로 보입니다.
examples/youtube_reaction.py
"""
YouTube Reaction / Commentary Thumbnail

- Dark base with a dim red radial glow behind the subject
- Cut-out portrait (remove_background=True, needs quickthumb[rembg]),
  almost fully desaturated
- A huge "#1" at low opacity behind everything
- "VIRAL" headline and a view-count line built from TextParts
"""

import os

from quickthumb import Canvas, Filter, FitMode, LinearGradient, RadialGradient, Shadow, TextPart

FILE_DIR = os.path.dirname(__file__)
ASSETS_DIR = os.path.join(FILE_DIR, "..", "assets")
OUTPUT_PATH = os.path.join(FILE_DIR, "youtube_reaction.png")

os.environ["QUICKTHUMB_FONT_DIR"] = os.path.join(ASSETS_DIR, "fonts")
os.environ["QUICKTHUMB_DEFAULT_FONT"] = "Roboto"

PORTRAIT_PATH = os.path.join(ASSETS_DIR, "images", "reaction-surprised.jpg")

(
    Canvas(1280, 720)
    .background(color="#000000")
    .background(
        gradient=RadialGradient(
            center=(0.82, 0.48),
            stops=[("#3D1110", 0.0), ("#000000", 0.68)],
        )
    )
    .background(
        gradient=LinearGradient(
            angle=90,
            stops=[("#000000", 0.0), ("#000000E8", 0.46), ("#00000011", 1.0)],
        )
    )
    .text(
        content="#1",
        size=470,
        color="#FF453A",
        opacity=0.13,
        weight=900,
        letter_spacing=-18,
        position=(1210, 28),
        align=("right", "top"),
    )
    .shape(
        shape="ellipse",
        position=(1034, 372),
        width=548,
        height=548,
        color="#1C1C1E",
        align=("center", "middle"),
    )
    .image(
        path=PORTRAIT_PATH,
        position=(1280, 720),
        width=620,
        height=710,
        fit=FitMode.COVER,
        align=("right", "bottom"),
        remove_background=True,
        effects=[
            Filter(contrast=1.08, saturation=0.08),
            Shadow(offset_x=-12, offset_y=12, color="#00000099", blur_radius=26),
        ],
    )
    .text(
        content="48H SIGNAL",
        size=17,
        color="#A1A1A6",
        weight=700,
        letter_spacing=3,
        position=(64, 54),
    )
    .shape(
        shape="rectangle",
        position=(64, 92),
        width=610,
        height=1,
        color="#FFFFFF33",
    )
    .text(
        content="VIRAL",
        size=212,
        color="#F5F5F7",
        weight=900,
        letter_spacing=-5,
        position=(52, 104),
    )
    .text(
        content=[
            TextPart(text="12.4M", color="#F5F5F7", weight=700),
            TextPart(text="  VIEWS", color="#A1A1A6", size=24, weight=600),
        ],
        size=92,
        color="#F5F5F7",
        weight=700,
        letter_spacing=-2,
        position=(60, 392),
    )
    .text(
        content="WHY IT WORKED — AND WHAT COMES NEXT",
        size=19,
        color="#A1A1A6",
        weight=600,
        letter_spacing=2,
        position=(64, 650),
    )
    .shape(
        shape="rectangle",
        position=(64, 620),
        width=610,
        height=1,
        color="#FFFFFF33",
    )
    .render(OUTPUT_PATH)
)

print(f"✓ Reaction / commentary thumbnail created: {OUTPUT_PATH}")
튜토리얼
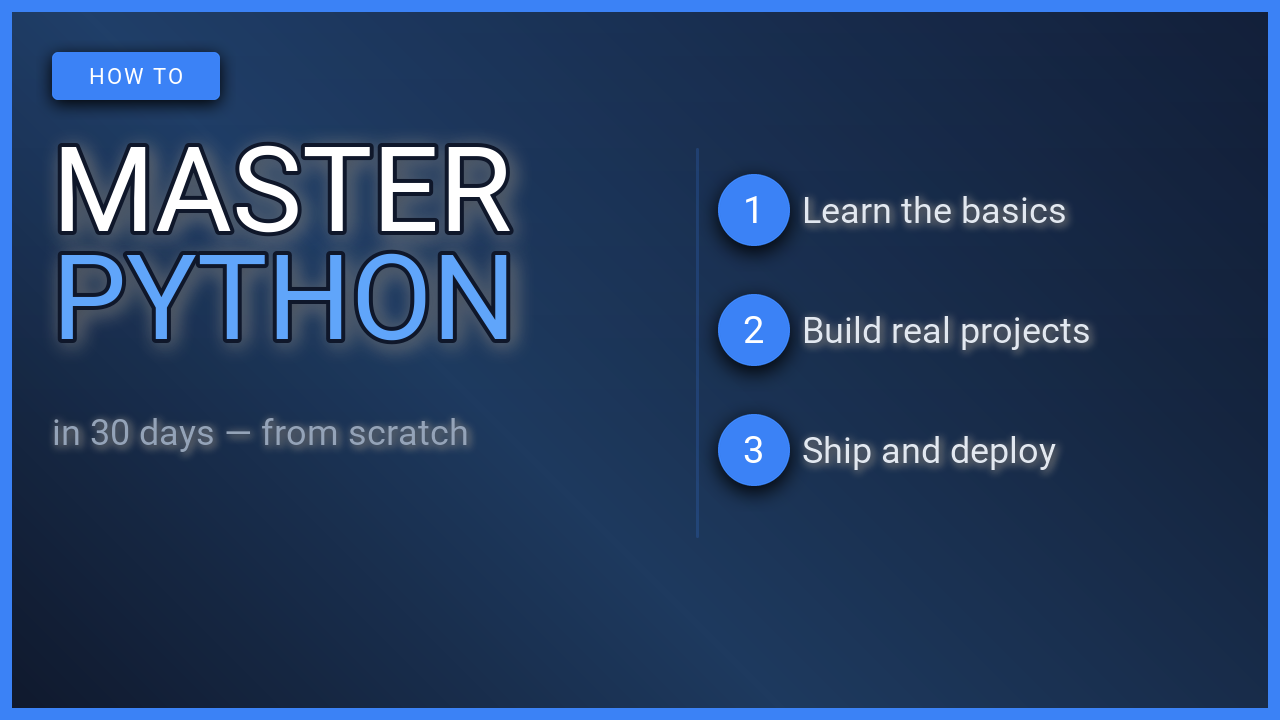
사진 없이 제목, 파란 패널, 몇 줄의 "코드"로 구성합니다.
- 패널의 코드는 텍스트 레이어 하나입니다. 각
TextPart에 색상과 굵기를 지정하는 것만으로 문법 강조처럼 보이게 합니다. - 색상은 모듈 수준 상수(
BLUE,WHITE,GRAY)이므로 세 줄만 고치면 썸네일 스타일을 바꿀 수 있습니다.
examples/youtube_tutorial_explainer.py
"""
YouTube Tutorial / Explainer Thumbnail

- Black background with a blue panel on the right; no photos
- Two-tone headline built from TextParts
- A code snippet on the panel, "highlighted" by giving each TextPart
  its own color and weight
"""

import os

from quickthumb import Canvas, TextPart

FILE_DIR = os.path.dirname(__file__)
ASSETS_DIR = os.path.join(FILE_DIR, "..", "assets")
OUTPUT_PATH = os.path.join(FILE_DIR, "youtube_tutorial_explainer.png")

os.environ["QUICKTHUMB_FONT_DIR"] = os.path.join(ASSETS_DIR, "fonts")
os.environ["QUICKTHUMB_DEFAULT_FONT"] = "Roboto"

BLUE = "#0A84FF"
WHITE = "#F5F5F7"
GRAY = "#86868B"


def main():
    """Render the tutorial thumbnail."""
    canvas = (
        Canvas(1280, 720)
        .background(color="#000000")
        .shape(
            shape="rectangle",
            position=(704, 0),
            width=576,
            height=720,
            color=BLUE,
        )
        .shape(
            shape="rectangle",
            position=(56, 58),
            width=10,
            height=10,
            color=BLUE,
        )
        .text(
            content="HOW TO  /  PYTHON",
            size=17,
            color="#A1A1A6",
            weight=700,
            letter_spacing=3,
            position=(88, 52),
        )
        .text(
            content="PYTHON  /  RUN",
            size=16,
            color="#FFFFFFB8",
            weight=700,
            letter_spacing=2,
            position=(1224, 52),
            align=("right", "top"),
        )
        .shape(
            shape="rectangle",
            position=(56, 96),
            width=1168,
            height=1,
            color="#FFFFFF33",
        )
        .text(
            content=[
                TextPart(text="MASTER\n", color=WHITE, weight=700),
                TextPart(text="PYTHON.", color=BLUE, weight=800),
            ],
            size=148,
            line_height=0.88,
            letter_spacing=-4,
            position=(50, 136),
        )
        .text(
            content="in 30 days — from scratch",
            size=27,
            color=GRAY,
            weight=500,
            position=(58, 474),
        )
        .text(
            content="BUILD  /  RUN  /  SHIP",
            size=15,
            color="#A1A1A6",
            weight=700,
            letter_spacing=3,
            position=(60, 646),
        )
        .text(
            content=[
                TextPart(text="def ", color="#FFFFFFB8", weight=500),
                TextPart(text="ship", color="#1D1D1F", weight=800),
                TextPart(text="(idea):\n", color="#FFFFFF", weight=500),
                TextPart(text="    build(idea)\n", color="#FFFFFF", weight=500),
                TextPart(text="    return ", color="#FFFFFFB8", weight=500),
                TextPart(text='"LIVE"', color="#1D1D1F", weight=800),
            ],
            size=42,
            line_height=1.55,
            position=(744, 168),
        )
        .shape(
            shape="rectangle",
            position=(744, 474),
            width=480,
            height=1,
            color="#FFFFFF66",
        )
        .text(
            content=">>>  SHIPPED / LIVE",
            size=36,
            color="#FFFFFF",
            weight=700,
            letter_spacing=1,
            position=(744, 510),
        )
    )

    canvas.render(OUTPUT_PATH)

    print(f"✓ Tutorial / explainer thumbnail created: {OUTPUT_PATH}")
    print("  Swap the step labels and headline text for any how-to topic.")


if __name__ == "__main__":
    main()