Instagram 카드
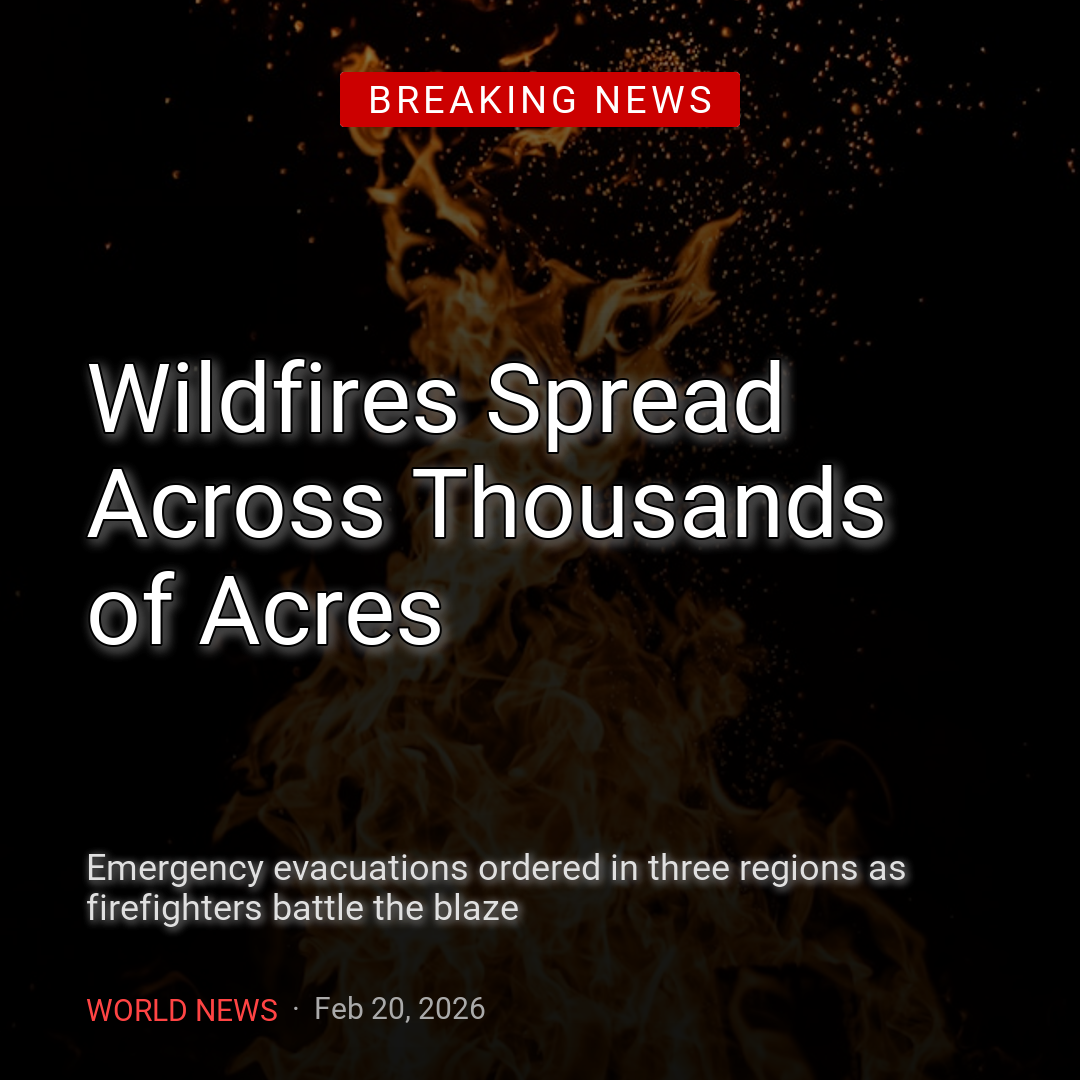
사진 위에 빨간 라벨과 세리프체 제목을 올리고 출처를 덧붙인 정사각형 뉴스 카드입니다.
예제를 실행하려면 uv를 설치하고 저장소를 복제하세요.
git clone https://github.com/sjquant/quickthumb
cd quickthumb
uv run python examples/instagram_news_card.py
스크립트는 examples/instagram_news_card.png를 기록하며 같은 이름의 기존 파일을 덮어씁니다.
구성 방식
- 라벨은
Background효과가 있는 텍스트입니다.Background(color="#CC0000", padding=(11, 22))는 "BREAKING NEWS" 주위에 빨간 상자를 그립니다. 별도 도형의 크기를 조절할 필요 없이 텍스트와 함께 커집니다. - 제목은 나머지와 다른 글꼴을 사용합니다.
font="NotoSerif"는 번들 글꼴 폴더에서 세리프 글꼴을 불러옵니다. 나머지 레이어는 기본 Roboto를 사용합니다. - 빨간 막대는 너비 9px의 사각형입니다. 별도 도형이므로 두 줄 제목에 맞춰 위치와 높이(176px)를 직접 정합니다.
- 출처 줄은 텍스트 레이어 하나입니다. 두
TextPart가 "WORLD NEWS"와 날짜에 서로 다른 색상과 굵기를 지정합니다. - 위치는 주로 백분율로 지정합니다.
("8%", "92%")처럼 쓰면 캔버스 크기에 맞춰 위치도 조절됩니다. 빨간 막대는 제목에 정확히 맞춰야 하므로 예외적으로 픽셀 좌표를 사용합니다.
코드
"""
Instagram News Card Example

Creates a breaking news-style Instagram card (1080x1080) with:
- Fire background image (cover fit, darkened)
- Dark gradient overlay for text legibility
- "BREAKING NEWS" badge
- Bold headline with stroke
- Source and timestamp at the bottom
"""

import os

from quickthumb import Canvas, Filter, FitMode, LinearGradient, TextPart
from quickthumb.models import Background, Shadow, Stroke

FILE_DIR = os.path.dirname(__file__)
ASSETS_DIR = os.path.join(FILE_DIR, "..", "assets")

os.environ["QUICKTHUMB_FONT_DIR"] = os.path.join(ASSETS_DIR, "fonts")
os.environ["QUICKTHUMB_DEFAULT_FONT"] = "Roboto"

SIZE = 1080

(
    Canvas(SIZE, SIZE)
    # 1. Background: fire image, cropped to fill the square
    .background(
        image=os.path.join(ASSETS_DIR, "images", "tobias-rademacher-wnF27F85ZKw-unsplash.jpg"),
        fit=FitMode.COVER,
        effects=[Filter(brightness=0.9, contrast=1.1, saturation=0.9)],
    )
    # 2. Dark gradient overlay — bottom two-thirds darkened for text legibility
    .background(
        gradient=LinearGradient(
            angle=90,
            stops=[("#00000000", 0.0), ("#000000B8", 0.42), ("#000000F2", 1.0)],
        ),
    )
    .text(
        content="LIVE  /  20:42 UTC",
        size=19,
        color="#FFFFFFAA",
        weight=700,
        letter_spacing=3,
        position=("8%", "6%"),
        align=("left", "top"),
    )
    .shape(
        shape="rectangle",
        position=("8%", "11%"),
        width=908,
        height=2,
        color="#FFFFFF44",
    )
    # 3. "BREAKING NEWS" badge near the top
    .text(
        content="BREAKING NEWS",
        size=28,
        color="#FFFFFF",
        weight=900,
        letter_spacing=4,
        position=("8%", "15%"),
        align=("left", "top"),
        effects=[
            Background(color="#CC0000", padding=(11, 22), border_radius=2),
        ],
    )
    .shape(
        shape="rectangle",
        position=("8%", 464),
        width=9,
        height=176,
        color="#E11D2E",
        border_radius=4,
    )
    # 4. Main headline — large, bold, white with shadow
    .text(
        content="Wildfires Spread\nAcross 18,000 Acres",
        font="NotoSerif",
        size=84,
        color="#FFFFFF",
        weight=900,
        position=("11%", "52%"),
        align=("left", "middle"),
        line_height=1.12,
        effects=[
            Stroke(width=1, color="#000000"),
            Shadow(offset_x=0, offset_y=6, color="#000000AA", blur_radius=10),
        ],
    )
    # 5. Source and timestamp row
    .text(
        content=[
            TextPart(text="WORLD NEWS  ", color="#FF4444", weight=700),
            TextPart(text="·  Feb 20, 2026", color="#AAAAAA", weight=400),
        ],
        size=30,
        position=("8%", "92%"),
        align=("left", "top"),
    )
    # Render
    .render(os.path.join(FILE_DIR, "instagram_news_card.png"))
)

print(f"✓ Instagram news card created: {os.path.join(FILE_DIR, 'instagram_news_card.png')}")